


Proper sod installation is one of the cornerstones of maintaining a beautiful, healthy lawn. Whether you’re starting a new lawn or revitalizing an existing one, starting on the right foot is paramount.
It’s easy to assume that sod should be installed during warm weather. However, the reality is that winter sod installation is just as effective as spring or summer installation. You don’t have to wait for the sun to be shining to get started on the yard of your dreams.
Let’s jump right in and uncover how to leverage the winter months to achieve a lush, thriving lawn.
Benefits of Winter Sod Installation
There are distinct advantages of installing sod in winter that you might not be aware of. Here are some of the most significant benefits to consider.
Lower Temperatures
Winter’s cooler temperatures can actually be a boon for sod installation. These milder conditions reduce the stress on freshly laid sod, allowing it to establish roots more effectively. This is because the cooler weather slows down the grass’s growth, affording it ample time to adapt to its new surroundings without the pressure of scorching heat.
Reduced Weed Competition
During the winter months, most weeds either go dormant or exhibit limited growth. This natural slowdown in weed activity means that the newly installed sod faces fewer challenges from competing weeds for nutrients and space. As a result, your sod has a better chance of taking root and establishing itself without the relentless battle against invasive weeds.
More Consistent Moisture Levels
Winter typically brings steadier moisture levels to your lawn. The colder temperatures reduce evaporation, helping maintain a consistently moist soil environment. This constant moisture is incredibly beneficial for root development and overall sod health, reducing the necessity for frequent watering during the installation phase.
Cost-Effectiveness of Winter Installation
Another compelling reason to consider winter for your sod installation project is the potential for cost savings. Many sod suppliers offer discounted prices during the off-season, which includes the winter months. These discounts result in substantial savings on your overall project expenses.
Lower demand for sod in winter often means you have access to top-quality turf at a more budget-friendly price, making it a financially appealing time to embark on your landscaping endeavor.
Potential for Faster Establishment in Spring
One of the most exciting advantages of winter sod installation is the possibility of quicker establishment when spring arrives. By jumpstarting your sod installation during the winter, your sod develops robust roots beneath the soil’s surface.
This enhanced root system sets the stage for accelerated growth and lush greenery when warmer weather finally graces your landscape. You’ll be able to enjoy a well-established lawn much sooner than if you had waited until spring to initiate your sod installation.
Selecting the Right Sod for Winter Installation
The choice of sod variety plays a pivotal role in the success of your winter sod installation project. Different types of sod are better suited to varying climates. Your selection should align with the specific winter conditions in your region, whether it’s a harsh cold or milder temperature.
Sod comes in an array of green shades and textures. Your choice should align with your desired visual aesthetics for your lawn, matching your personal preferences and your property’s overall look.
Different sod types establish roots at different rates. Understanding your chosen sod’s growth rate will impact your expectations for the installation process and how soon you enjoy a lush lawn.
Not all sod varieties are created equal when it comes to winter installations. Here’s a look at some popular options and their suitability for the winter season:
Kentucky Bluegrass
Kentucky Bluegrass is recognized for its lush green color and fine texture. It’s well-adapted to colder winter climates, making it a preferred choice for lawns in regions with chilly winters.
Fescue Varieties
Tall Fescue and Fine Fescue are cold-resistant options known for retaining their green color throughout winter. They perform admirably in areas with both cold winters and hot summers.
Ryegrass
Perennial Ryegrass is a cool-season grass that thrives in moderate winter temperatures. It’s frequently used in winter overseeding projects to maintain a green lawn during the season.
Bermuda Grass
While not typically selected for winter installations, Bermuda Grass is a suitable option in regions with mild winter conditions. It retains its green hue during the winter months in such areas.
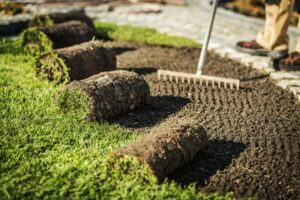
Preparing Your Soil
Soil preparation is a critical aspect of any successful sod installation project. It plays a pivotal role in the long-term health and vitality of your lawn.
Well-prepared soil fosters robust root growth and ensures nutrient availability, which is crucial for year-round lawn health, especially in winter when nutrient uptake may be limited. Effective soil prep aids water management, preventing excess water during rains and maintaining optimal moisture levels in drier times.
Adequate soil preparation involves a series of essential steps to create an ideal environment for your new sod.
Soil Testing
Kickstart the process with a soil test. This test evaluates your soil’s pH levels and nutrient content. It provides valuable insights into any necessary adjustments to optimize soil conditions for successful sod installation.
Soil Amendment
Based on the results of your soil test, you may need to amend the soil. This includes altering the pH with materials like lime or sulfur. Additionally, introducing organic matter like compost enhances soil structure and fertility.
Grading and Leveling
Properly grading and leveling the soil surface is crucial to ensure an even, smooth base for your sod. This step prevents water pooling in low areas and guarantees uniform sod establishment.
Sod Installation Process
Let’s take a detailed look at the step-by-step process of installing sod:
- Measuring and Ordering Sod: Start by accurately measuring the area where you plan to install sod. It’s crucial to order the correct quantity of sod based on these measurements to ensure complete coverage.
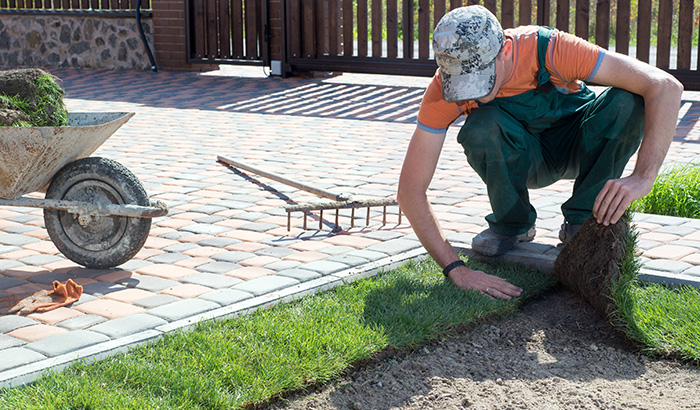
- Sod Delivery and Handling: When the sod is delivered, handle it with care to prevent damage. Since sod rolls are quite heavy, consider enlisting some assistance. Keep the sod neatly stacked and avoid walking on it before installation to prevent compaction.
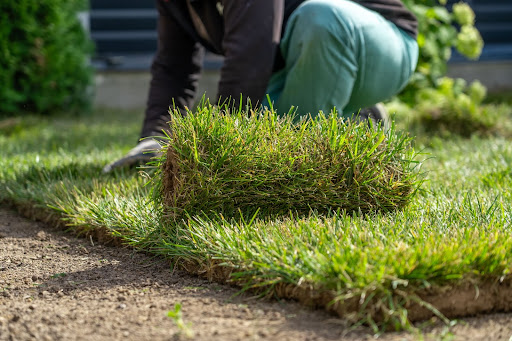
- Laying the Sod: Begin laying the sod along a straight edge, such as a sidewalk or driveway, for a neat appearance. To ensure stability and a seamless look, stagger the seams of the sod rolls in a brick-like pattern.
- Proper Spacing and Staggering: To prevent weed growth and soil erosion, ensure there are no gaps between sod pieces. While the sod should fit closely together, avoid stretching it. Stagger the seams by half the length of a sod roll to enhance stability.
- Rolling and Tamping: After installing sod, use a lawn roller to ensure good contact between the soil and the sod. This also helps eliminate air pockets. Gently tamp the sod with the roller to create a smooth, even surface.
Common Mistakes to Avoid
To achieve a successful sod installation, it’s essential to be aware of common mistakes to avoid:
- Overstretching Sod: Pulling the sod too tightly results in gaps when it shrinks, providing space for weeds to grow.
- Incomplete Soil Preparation: Skipping the soil preparation step hinders root growth and the establishment of the sod.
- Neglecting Staggering: Failing to stagger the seams lead to a less stable and visually disjointed lawn.
- Insufficient Rolling: Inadequate rolling and tamping might result in uneven surfaces and air pockets beneath the sod.
Beyond the initial steps of measuring, ordering, handling, laying, spacing, staggering, and rolling during the sod installation process, proper watering immediately afterward is indispensable for promoting robust root growth and cultivating a lush, healthy lawn.
In fact, the significance of proper watering immediately after sod installation cannot be overstated. It plays a crucial role in root establishment as the sod’s roots need adequate moisture to establish themselves in the soil.
Proper watering helps mitigate the stress that sod undergoes during transplantation and prevents the newly laid sod from drying out, which could otherwise hinder its ability to take root effectively.
Lastly, adequate and timely watering is essential for minimizing gaps between sod pieces, facilitating their bonding, and ensuring a uniform and visually appealing appearance.
Taking Care of Your Sod During Winter
Once your sod is in place, it’s crucial to provide it with proper care and attention throughout the winter season to keep it healthy and vibrant. This involves several key considerations.
Even in the winter, maintaining the right watering routine is essential. While your sod won’t require as much water as it does in warmer months, it should never be allowed to completely dry out. The strategy here is to water less frequently but more deeply to maintain consistent soil moisture. Morning watering is ideal because it will let the grass dry before nightfall, reducing the risk of fungal diseases.
Regularly monitor your sod for signs of stress or disease. Watch for changes in color, thinning, or unusual patterns of grass growth. Early detection enables you to take prompt action to prevent further damage.
Although pest activity tends to decrease in colder weather, some insects may still be active during winter. Be on the lookout for any signs of infestation on your sod. If you suspect a problem, it’s wise to consult with a professional for the proper pest control measures.
You’ve put in a lot of work so far, and you will want to protect your sod from harsh winter weather, particularly snowfall. Be gentle when removing excess snow from your sod. Opt for a plastic shovel or a snow blower set to a high clearance to prevent damage to the grass.
During frost or thaw cycles, your sod becomes fragile. To prevent compaction and stress on the grass, it’s best to avoid walking on it when it’s frozen or soggy.
Lastly, consider your winter mowing practices. Adjust your mower blade to a higher setting during the winter months, allowing the grass to remain slightly taller. This longer grass offers better protection against the cold and reduces the risk of scalping.
Choose Monarch Sod For Your Lawn Makeover
As you embark on the journey to achieve that perfect springtime lawn, why should Monarch Sod be your top choice for winter sod installation? The answer is simple — we provide exceptional services and tailored solutions for the unique Utah landscape.
At Monarch Sod, we offer Utah-specific sod varieties, including Kentucky Blue Grass and drought-resistant blends for our unique desert climate. Whether you’re a homeowner, contractor, farmer, or part of a municipal project, we provide high-quality sod that can be professionally installed within hours, saving you time and effort.
Our commitment to your satisfaction includes offering video instructions to ensure accurate measurements for your sod needs. Call Monarch Sod today at 801-701-8633, and get ready to enjoy the luscious lawn of your dreams!
toto slot toto slot toto togel toto slot situs toto situs togel